• Skip to content
  • Skip to primary sidebar

True Preparedness

Easier living in hard times

Andrew Skousen

How to Grow Your Own Dry Beans

July 10, 2018 by Andrew Skousen

photo credit

Beans are an important staple crop to grow along with corn, squash and potatoes. Devote most of your gardening time to learn how to grow these staples consistently. Fortunately, they are among the easiest plants to grow, store and propagate thanks to their large seeds or tubers and their fast-growing natures. Part of the difficulty is learning to plant, grow and harvest these crops in sufficient quantity to provide food for you all year.

Beans are especially important because of their role in crop rotation. Beans, peas and other legumes foster nitrogen-producing bacteria that add nitrogen into the soil. If your garden space is limited, consider growing pole beans or climbing beans on other plants, such as corn stalks. Just plant the beans on the sunny side of the corn plants when the corn is already 6 inches high. Some people even grow squash in the same area in what they call the “three sisters” planting, where groups of the three are planted every 4 or 5 feet in mounds. The nitrogen from the beans isn’t released into the soil until after the beans have died, and the roots decompose, so the corn might need some manure or compost early on. Vine beans don’t produce well if fertilized with nitrogen (they produce too many leaves), but bush beans with pale yellow leaves that seem struggling might need a little nitrogen in the form of fish emulsion.

How many bean plants are enough?

In hard times animal protein will be scarce and expensive, so beans will be needed to add protein to more of our meals. I still only expect to need about a ½ cup of cooked beans (1 serving) per person per day. That translates to 60 pounds or a 5-gallon bucket of beans per year for each adult. The OSU extension service says 100 ft of dry beans will produce 20 to 25 lbs of dry beans which means you need 250 to 300 feet of beans per person per year. Almost all bean varieties can be picked young as green beans, but the pods on typical dry bean varieties quickly become too tough to eat fresh.

How much garden space is needed?

Bush beans can be planted every 6 to 8 inches but climbing vine beans are spaced wider at every 10 inches. It turns out the land needed for both types of beans is approximately the same because climbing beans produce more per plant. Commercially grown dry beans in Idaho are planted in rows 24″ apart, but a grower in the dry part of Oregon produces much more by planting 44″ wide beds with three rows 1 ft apart. Some dry beans are also tasty if harvested early as green snap beans. In this case, plant them 2ft apart so you can pick both sides of the bean plants, but dry beans are only picked at the end as you pull up the whole plant, so a closer planting works well.

What variety of beans should you plant?

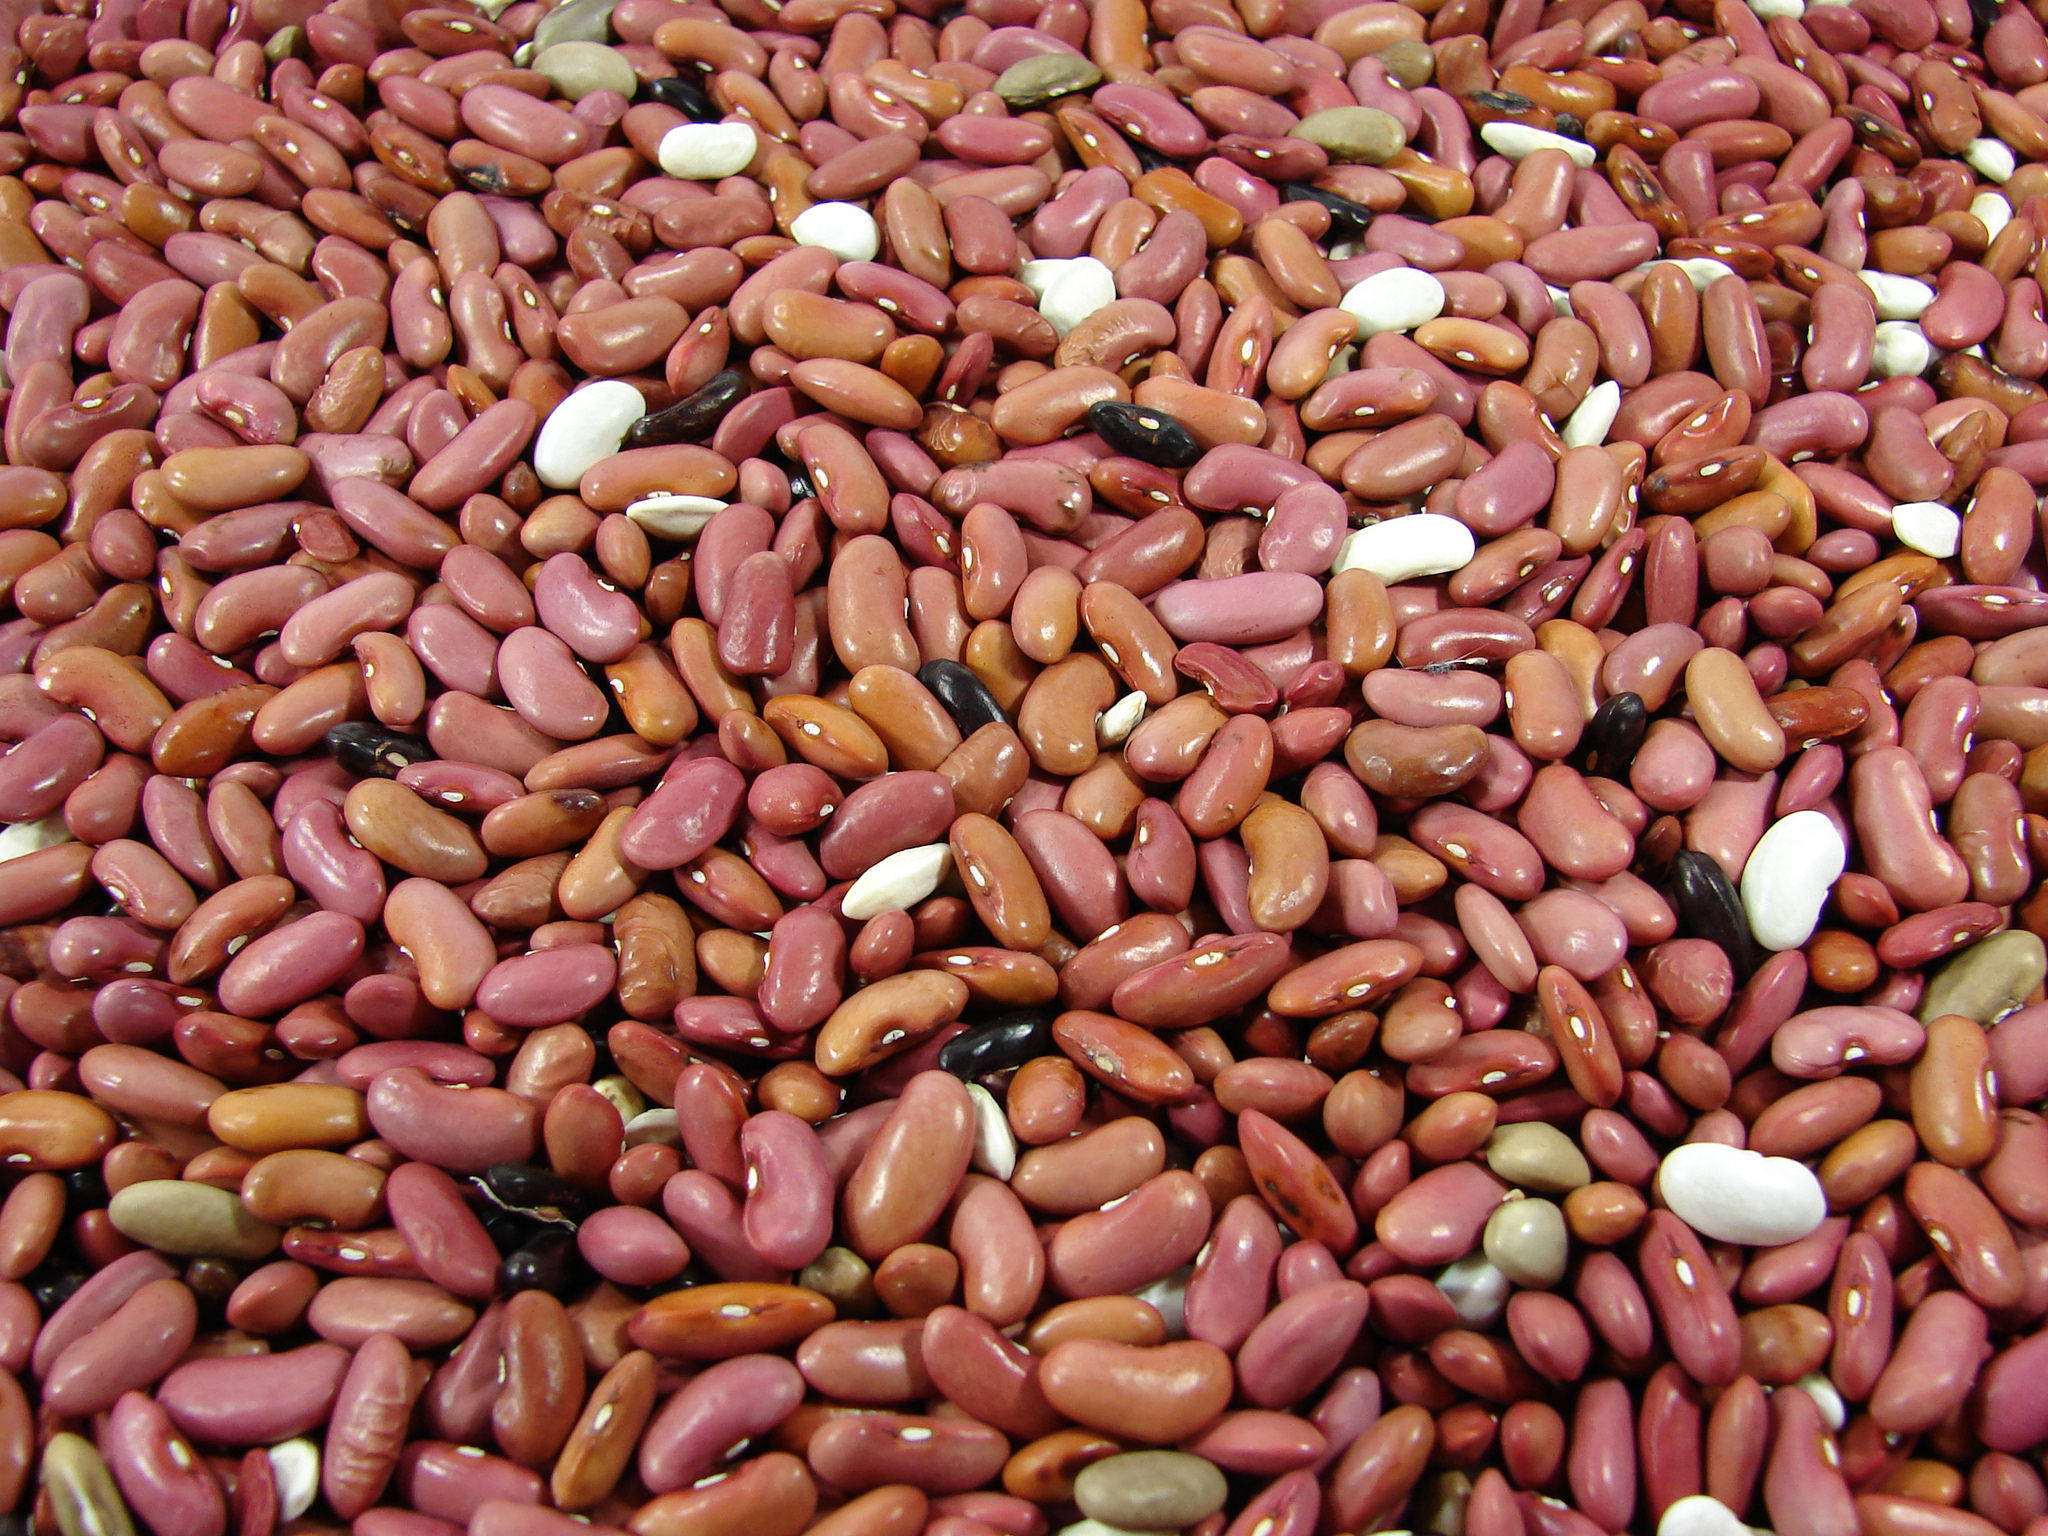
Beans are self-pollinating so you can easily plant any dry bean seed and get the same variety again. In fact, if you have old, hard beans in your food storage that don’t cook up well, just sow them into the ground. Many of them will sprout and produce a new, fresh crop for you. You can even save seeds from multiple varieties in the same garden and they won’t cross with each other as long as they aren’t planted side-by-side.

I recommend Tepary beans for their drought tolerance even in hot, dry climates. Their seeds are small, but prolific and they handle the alkaline soils of the West very well. The Cherokee “Trail of Tears” bean is a good variety of small black beans that can be harvested early as a tasty snap bean and later as a small black bean, but it is a pole bean and needs a trellis, cornstalk or sunflower to grow up for best results. Mother Earth News has a good summary of other heirloom bean varieties with tips on how to grow them, but I would first just try the dry beans in your food storage that you already like using. They should stay true-to-type even if they aren’t an heirloom variety.

Harvesting dry beans

This can be challenging on a big scale without a combine. The best advice on harvesting came from the small farm in Eastern Oregon mentioned above. They stop watering their ½ acre bean field a month before harvest to encourage it to dry out and finish off. Before the fall rains hit, they pull up the plants in the morning when a little dew keeps them flexible. They carefully remove any dirt clods that might get mixed with the beans and be hard to separate later, and then they gather the plants on the biggest tarp they can find (at least 20 ft x 60 ft). After allowing them a few days to finish drying, they thresh the dry plants by simply driving over them with a vehicle until all the pods are broken up. Some people with smaller quantities just thresh by walking or dancing to break open the dry pods while others pound them with sticks. Next is sifting and “scalping” away the dry plant material and the final step is to winnow or drop the beans in front of a strong fan to blow away the last, fine particles until only the dry bean seeds remain.

Storing Dry Beans

Dry beans, of course, store very well. But they need to be dried out thoroughly. They are properly dry when your teeth can’t make an indentation, or when it shatters rather than smashes when hit with a hammer. Store in an airtight container like a bucket with a sealed lid. Beans will last several years in cool, dry storage, but a good pressure cooker can soften up even older, hard beans. But nothing beats the flavor and easy cooking of freshly harvested beans. With the wide variety of beans available, try several out and find the variety that you prefer and that grows well in your garden. [END]

Filed Under: Uncategorized

Cast Iron – the Best Pans for Hard Times (and Prosperous Times)

June 27, 2018 by Andrew Skousen

Photo credit: Mark Bonica

Among the shiny copper-bottomed cookware of chefs you will also find a few bulky black pans that look like they just fell out of a wagon heading west. What is the appeal of these thick black pans that rust when you wash them and are so cheap they even sell them at Walmart? The unique qualities of cast iron make them quite practical for hard times. Their thick metal handles campfire or wood stove cooking well, and the black surface heats up well in parabolic solar cookers.

History of Cast Iron Pans

The simplicity and durability of iron ore cast into pans dates back centuries when most people were still cooking over open fires. The most common was a deep dish pot called a “spider” with a long handle, three legs and a lid. It could be set among coals without smothering the fire or be easily suspended over a larger fire by the handle. It was used for everything and was the most important item in the pioneer kitchen. Similar cast iron pots called “dutch ovens” are popular among camping enthusiasts, especially after the cook learns how to cook with the variable heat from the fire.

Iron is Better than Teflon

The most popular form of modern cast iron cooking is the skillet, as more people become frustrated with their Teflon coated pans that scratch easily and off-gas if the pan ever gets above 500 degrees F. Many people are also learning how dangerous aluminum cookware is especially when rubbed and scratched frequently. A few researchers have linked aluminum toxicity with Alzheimer’s and other mental disorders. Cast iron handles high heat just fine, from the stovetop or oven to the fire pit. The thick metal is nearly indestructible and works well with metal utensils. It is so durable it can be cleaned by simply burning out any leftover bits of food, or wiped out with sand if no water is available for cleanup.

Cast iron pans are truly cast (as opposed to pressed or rolled like steel) by pouring molten iron into stiff sand and clay molds. Iron ore casting is cheap compared to the processing and rare metals needed for carbon steel or stainless steel. Cast iron is not as strong without these additions, however, so cast iron pans are made thicker to withstand the high, uneven heat of cooking. The sand mold gives the pans their distinctive rough surface on the outside although the inside cooking surface is milled to be smooth. The metal is treated with a cheap oil while still warm to “season” it, an age-old process that turns the iron black and creates a thin barrier against water and rust.

Which Cast Iron Brand is “Best”?

Look for pans made in the USA or Europe for good quality iron. Many manufacturers like Lodge are shipping their products from China. The best pans are passed down in the family or found at antique stores. Old cast iron pans were handmade from better quality steel to be thinner and lighter and easier to cook with. Old pans are frequently smooth and slightly misshapen. Sought-after brands are Wagner and Griswold but the oldest ones may not have any markings at all.

Cooking with Cast Iron

There is some discussion about the best way to keep cast iron “seasoned” so it stays rust-free. A layer of oil naturally keeps water off, but true seasoning forms a barrier where it contacts the iron. Higher quality fats with omega-3 fatty acids oxidize and break down into a polymer that forms a hard surface. Some people have had success using very thin layers of 100% flaxseed oil to season their pans—essentially getting a food-grade version of linseed oil varnish. A century or more ago they just seasoned their pans by frying up some lard, which gave good results. Lard isn’t as common in the kitchen anymore, but bacon is reasonably close.

The key to cooking with cast iron is to use fat when cooking, and to preheat the pans. The pan should be hot enough that the food sizzles when you drop it in but it should not be so hot that the fat or oil starts to smoke. Although the pans can be used for everything, acidic liquids like tomato sauce can leach out the iron, giving a strong flavor to food. If you want the best of both worlds consider one of the much more expensive enamel coated cast iron pans. Keep some of this old-fashioned cookware around and it will prove useful when you have to cook in hard times from a variety of heat options. In the meantime it is still the best way to cook bacon, hashbrowns and cornbread. [END]

Filed Under: Self Sufficient Living Tagged With: camping, cast iron, cooking, cookware, cornbread, dutch oven, Griswold, Lodge, pans, parabolic cooker, seasoning

Securing Your Doors with Deadbolt Locks

April 20, 2018 by Andrew Skousen

Thieves Target Doors

Door locks are a critical part of the security of your home. Although there is almost always a way around a lock, given enough time and the right tools, a good quality lock can slow down and even deter a criminal, or make them look for an easier way in elsewhere. Windows are still the weakest point in a house, but statistics show that criminals prefer targeting doors with cheap locks that they can just kick in. Here are some quick ways to make sure your doors are more secure as a first step toward better home security.

Step 1: Reinforce any Door with Longer Screws

First, reinforce your door hardware with longer screws. Most doors hinges and strike plates are mounted into the door frame with only 3/4″ screws. The quickest and most cost-effective way to reinforce your doorways is by replacing some or all of the screws at the hinges and strike plates into the wall with 3″ or even 4″ long wood screws (deck screws work well). This will anchor the hardware and door all the way into the wood studs on either side of the door and make it much harder to kick the door in. Door reinforcement kits take this a step further by adding long metal plates on the door jamb and over the hinges. If you already have enough clearance between the door and the jamb these install easily. The best option is the Door Armor Max for $70.

All of your exterior doors should have deadbolt locks in addition to the standard handle locks. Most front doors have them, but side and back doors may not—and they are precisely the doors that are more likely to be attacked by a burglar. Installing new deadbolts is not hard, even in metal doors if you have a drill and the right size hole-saw. The deadbolt instructions will have a template showing where to drill the holes and how big to make them.

Which Deadbolts Should You Buy?

ANSI Grade 1 is the highest rating for residential deadbolts, which means the lock successfully resisted a higher level of prying, hammering and brute-force entry, than other residential-grade locks. Schlage ($25) or Kwikset ($45) have decent grade 1 locks, but avoid the cheaper Master Lock which is notoriously poor quality and easy to defeat. If you are willing to pay up to $80 there are heavier duty locks from both these reputable brands. But for most people a $50 grade 1 residential lock is probably all you should spend unless you plan on reinforcing the other vulnerable areas around your home. Spend your money there first. We have more lock and door reinforcement recommendations in our product list.

The Best Deadbolt Locks

In a shelter or safe room with reinforced concrete walls and ceiling the weakest link in your security is the lock on the door. If your hideaway is found this is what stands between you any threats on the outside, so it pays to get the best. The ASSA 6000 ($215 and up) has a double row of pins that make it virtually pick proof and it boasts hardened steel inserts so it cannot be easily drilled out. Hardened ball bearing at the ends of the screws also protect them from being drilled or tampered with from the outside. The slightly cheaper Medeco locks are also resistant to lock picking including from so-called “bump keys” but they lack some of the hardened features of the ASSA.

Protection Against Lock Picking and “Bump Keys”

Bump keys are an easy way of lock picking using a special key (see above) and a soft hammer to bump it, jostling the tumblers in the lock to allow most standard keyed locks to open (with some practice). The more expensive locks we are recommending nearly all protect against this form of intrusion or make it harder. You can buy simple devices that mount on the inside and keep your deadbolt in the locked position so that no one can pick or open it from the outside (even with a spare key).

Remember too, that if you door has side lights that can be broken, use a double cylinder deadbolt that takes a key to turn it from both the inside and outside. Take a few minutes and review the locks on your doors and take some of these simple steps to reinforce them before your home gets targeted. [END]

Filed Under: Home Security Tagged With: deadbolt, doors, high security, home defense, intrusion, lock, security, theft

THE BEST OFF-GRID BATTERY

March 23, 2018 by Andrew Skousen

Batteries = Grid Independence

Planning on putting solar panels on your house? If so, don’t get sucked into making it “grid-tied” like the vast majority of Americans. When the power goes out, they will not be able to use the power being produced on their roof. The key is to have a battery bank. Before we dig into this topic, remember that your first focus in preparedness should be on food, water, shelter, and self-defense. After that you can expand to advanced topics like generating power.

Don’t waste your time with hydro or wind power, they are rarely cost-effective compared to solar. Solar has become easier now that the prices for panels and equipment have dropped. If you have a properly sized solar system it will generate power in a slow, steady stream all day but you still have to capture and store that power. Use a battery bank to store up daytime power for use at night and during cloudy days, instead of relying on the grid. There are also times when you need a big boost of power, like when the well pump first comes on.

Battery banks are expensive and, depending on the type of battery you choose, can be a very frustrating part of the system. Solar panels easily last decades with hardly any maintenance, but the typical lead acid battery banks require frequent water level maintenance. Another frustration comes every 5 to 10 years when you have to replace and dispose of the extremely heavy lead acid batteries. Fortunately, there are better, lighter battery options out there.

SimpliPhi Lithium Batteries

Lithium Iron Phosphate – The Safer Lithium Batteries

At the time of this writing, the best off-grid battery option is the Lithium Iron Phosphate or Lithium Ferrous Phosphate (LFP) batteries from SimpliPhi Power. At first glance these batteries look incredibly expensive at $1,000 to $3,000 apiece which seems like 10 times the cost of an equivalent voltage and amp-hour rated lead acid battery (such as the Trojan T-105, a popular deep cycle golf cart battery)—until you compare them to their lifecycle cost.

As I wrote last week, lead acid batteries lose life cycle capacity faster if you discharge them deeply. Even so-called “deep discharge” batteries are most efficient when you only discharge them by 20%. The T-105 golf cart batteries get about 3,000 cycles at this depth of discharge and then you need to haul them out and find some way to dispose of them. Compare this to the LFP batteries from SimpliPhi which are rated for 10,000 cycles all the way down to 80% discharge. AltEStore.com (which sells both batteries) did the math and found the LFP batteries were almost 10% cheaper over their life span.

Pros

Not only are LFP batteries cheaper in the long run but they are lighter, smaller, recharge faster, release power faster and you don’t need to ventilate them. That means you can store them anywhere, including a crawlspace. They won’t overheat, unlike other lithium-based battery technologies. SimpliPhi’s batteries come with embedded circuitry to avoid over-charge, over-discharge, shorts, or unbalanced cells. Also, a built-in 80 amp breaker eliminates any risk of over-current and provides a convenient on-off switch to that battery. But the biggest advantage is that they require no maintenance. You will never have to check the water level and rarely, if ever, replace the batteries.

Cons

The only drawback is they can’t be linked in series for higher voltage systems—48V is the highest unit right now. The cheapest prices I have found are at the Alt-E Store and at Northern Arizona Wind and Sun.

Why Not Tesla Powerwall 2?

There are other battery products out there, but none of them compare to SimpliPhi at this time. You may be looking forward to using Tesla’s sleek Powerwall 2. I was too, but although they are impressive, they are Lithium-iron cobalt which can overheat. The biggest problem is that they just aren’t designed for off-grid use at this time. Their website says this aspect is “coming soon” which is a common promise from Tesla that could mean anything from “soon” to “much later” or “never.”

Other manufacturers of Lithium Ferrous Phosphate batteries so far have failed to provide the same number of cycles and depth of discharge as SimpliPhi. ReLion, for instance, shows their slightly cheaper batteries losing up to 40% capacity after 10,000 cycles at 80% depth of discharge. SimpliPhi warranties their batteries for at least 80% remaining capacity after 10 years or 10,000 cycles.

We expect further improvements in the world of batteries in the future, with continued dropping prices, but if you are installing a backup power system in the near future, the LFP batteries from SimpliPhi are currently your best option. [END]

Filed Under: Alternate Energy, Self Sufficient Living, Solar Power

PLAN YOUR NEXT GARDEN

February 23, 2018 by Andrew Skousen

(Picture source)

February is a great time to garden—in your mind and on paper.

When most parts of the US are just beginning to thaw out from winter, gardeners are already envisioning plants growing and producing in the warmth of summer. Some gardeners succumb to the lure of temporary warm spell and start their plants early only to have Jack Frost nip them back. Don’t gamble—use this time instead for planning out the next garden. There is a lot to do before spring when you will be busy preparing the ground, setting up the watering systems and sowing seeds. February and March are perfect for reading up about plants, evaluating last year’s garden, and learning how to combat pests and diseases. It is also time to take stock of the seeds you saved from last year and order or buy new ones.

What to Try First

Be careful when perusing seed and plant catalogs; glossy pictures of beautiful mature plants and ripe produce are so tempting you can easily end up buying more seeds than you have space or energy for. From a preparedness perspective, you should start out learning to cultivate plants that are easy to grow and produce high-volumes of food, such as: zucchini, potatoes, beets, carrots, squash, and beans. Most gardeners also want to grow a few garden favorites like tomatoes, cucumbers, corn, peppers and pump

kins. After you have a little gardening experience you should also grow early-to-table crops like peas, lettuce, radishes, chard and kale.

Start a Garden Journal

A good garden plan should be written down each year in a notebook. These garden journals document how the garden was prepared (raised beds, furrows, square plots, etc), where plants grew, and a host of other information. You can document soil pH from tests, watering methods, fertilizers, mulching strategies, pests, diseases and remedies. The more information you keep track of, the easier it will be in a few years to know what went wrong and what worked well. Experience is very important in gardening, but there are so many factors it can be hard to remember where a plant grew well and where it fared poorly. By tracking the plant’s location, the general weather that year and other inputs, you can learn why some plants failed and hopefully how to remedy the problem to get a good crop when it really matters.

Crop Rotation

Crop rotation is an important part of your garden plan. The idea is that since plants use and give back different nutrients to the ground, it best to move them around each year to keep the soil healthy. However, crop rotation is a very inexact science, depending greatly on your gardening style and plants. In the first place, perennials like asparagus, rhubarb, and most herbs regrow in the same place year after year. Some plants that reseed themselves easily like turnips, lettuce and some onions are also best left to thrive in their own spot.

Crop rotation is most important for crops that are grown in large isolated groups—crops like corn and potatoes. Corn uses large amounts of nitrogen so it should follow peas, beans or other legumes that put nitrogen back in the soil. Chicken manure is also high in nitrogen, as is hay or shavings from animal stalls.

Potatoes are said to produce better if planted after corn. This important crop also has to be rotated to a new place each year to reduce the chances of disease building up in the soil. Try to give the soil three or four years between potato plantings to discourage any diseases. Tomatoes are in the same family as potatoes and may attract potato blight so don’t plant them in succession. Some gardeners keep tomatoes in the same spot year after year without problems and others claim they do even better if tomatoes are grown in the asparagus plot.

Farmers group their plants into similar families and keep members of the same family together in the rotation or separated by a few years. Here are the biggest groups: Nightshades: tomatoes, potatoes, peppers, eggplant; Brassicas: cabbage, broccoli, cauliflower, kale, collards and turnips; Legumes: peas, beans, lentils, and clover; Squash: squash, pumpkins, cucumbers, melons, and gourds; Carrots: carrots, turnips, fennel, celeriac. Goosefoot: beets, swiss chard, and spinach. Some plants, like onions and carrots, can be planted anywhere and are generally beneficial.

Here are a few more tips: The cabbage family does well following beans. Squash spreads out and smothers weeds. Beets and carrots pull a lot from the soil and are best following squash. Eliot Coleman, an organic farmer recommends rotating in this order: (1) Tomatoes, (2) peas, (3) cabbage, (4) sweet corn, (5) potatoes, (6) squash, (7) root crops, (8) beans.

The benefits of rotating crops has long been established, but the exact method varies. You may not want a plot of peas as big as your sweet corn was. Or your garden may be so small moving the corn around would shade other plants. You will have to find ways to work around the problems. Perhaps you may have to rotate by growing some crops one year and not another. Shade tolerant crops include beets, spinach, carrots, and summer lettuce. Some gardeners have success without rotating by growing many diverse plants together with companion plants that help revitalize the soil at the same time. You may also be able to revitalize most nutrients with good compost and digested manure or other natural fertilizers, but you have to watch out for diseases and pests.

As you can see, there are plenty of ways to grow crops, but to keep your soil and garden healthy year after year you should make a plan that will work for the next several years. Your garden journal is an important tool in this planning, and can really help you maximize your space to grow more abundantly. A good plan will save you time knowing where (and when) to plant things during the hectic spring. Your plan is also a valuable reference for identifying that new squash or tomato variety in the dense overgrown jungle at the end of the summer. Don’t forget to add notes at the end of the year about which varieties grew well for you, which preserved well, and, above all, which tasted good. [END]

Filed Under: Uncategorized

The Farm Homestead

February 9, 2018 by Andrew Skousen

**

My great-grandparents grew up on a farm. They had a large garden plot, a small house and a few rambling structures for animals. As a boy, I didn’t like visiting the farm; I thought it was smelly and run-down. Their house and kitchens didn’t have any nice, new items from the store. Their home and everything in it was simple and well-used. By modern standards they lived a “rough” life without many modern conveniences. They were quite old when I saw them but seemed happy with their slow life and went about their work in a with a sort of gentle firmness. They were doing what had to be done each day and they would get it done. They were friendly and kind, but never lavished me with attention, sweets or presents. I was glad when I could get back in our modern car and drive back to civilization.

Looking back, I now realize how impressive their life really was. Nearly all their food came from the large garden and the animals in the fields and pens. What they didn’t make they could barter for. They hardly ever went to the store. Even in their old age, their health was astounding. They worked hard every day well into their nineties and never went to a doctor, and rarely to a dentist.  They never went to a convalescent home. They took care of themselves until right up to the end. They passed in their sleep without enduring cancer or heart disease. In many ways they had achieved a level of health, vitality, longevity, and self-sufficiency that even modern “successful” people have trouble attaining. Although they never traveled the world or fulfilled a “bucket list,” I’m confident they can look back on their life with satisfaction, knowing they lived it fully with little to be ashamed of.

I think many aspects of our modern life would surprise them. They might even laugh at at the many stores and restaurants we frequent so often we “can’t live without them.” If the power went out our lives would get real hard real fast; Their homestead would largely keep right on going, although many aspects would be affected, they could work around it.

Sometimes we think preparedness means a well-stocked food storage room, but that’s really just an extension of our modern store mentality—notice it’s called home “storage.” Like savings, stored supplies go fast if you don’t have an income stream. Fortunately, it’s not hard to put food on the table if you learn to grow a garden now and in prolonged hard times.

Gardening requires much more than a #10 can of stored seeds in your shelter. At a minimum you’ll need fertile ground, reliable water and experience.

How much land do you need? Depending on your climate, 50 feet x 50 feet will be plenty for a vegetable garden. You’ll need a half acre for serious food growing, but even a quarter acre can provide a year’s worth of food for a small family if you have good gardening experience and carefully lay out trees and fruit-bearing bushes. Advanced techniques like greenhouses, container gardens or hydroponic systems (growing plants in water) can produce more food per square foot, but they require extra knowledge and equipment. If you live in a severe climate, or have limited water you might need one of these systems. Get it early and practice using it.

Don’t take your water supply for granted. Most famines come from a lack of water. Hopefully your strategic retreat will have a gravity-fed water source so it isn’t dependent on pumps and electricity. Properties with springs or above-ground streams are good if they flow year-round, otherwise consider a pond or cistern. Wells with windmill or solar-driven pumps can also be reliable. Much less water is needed if you use a drip watering system that just puts it where you want it (and not to the weeds). Soaker hoses, drip irrigation and automatic timers are worth the small investment. Mulching around plants keeps water in and weeds down. A good compost pile can provide mulch and nutrients from yard and garden waste.

Gardening takes experience, especially if you have a limited growing season. Fortunately, you don’t have to be a master gardener to start out. Beans, peas, radishes and zucchini come up easily with basic care. Crops that need to be started indoors (depending on your climate) like tomatoes and peppers are more challenging, but well worth the effort. Some crops we routinely see in the store require other techniques to grow like grapes, strawberries, celery, asparagus, herbs and grains. Expand to grow what you like to eat or learn to like what grows well in your area.

Yes, it’s cheaper and easier to get produce at the store, but you’ll find that even “Organic” can’t compare to the taste, quality and freshness of what you pull in from your backyard. In the meantime enjoy the fresh air and the exercise. Don’t give up if your first try ends up in a weed patch. Cover it with leaves and mulch and try again next year. Someday you’ll laugh that you ever actually paid for zucchini.

**(Not a picture of my grandparents)

Filed Under: Gardening and Livestock, Self Sufficient Living Tagged With: farm, food storage, garden, homestead, homesteading, power outage, self-sufficiency, self-sufficient

  • Page 1
  • Page 2
  • Next Page »

Primary Sidebar

Recent Posts

  • How to Grow Your Own Dry Beans
  • Cast Iron – the Best Pans for Hard Times (and Prosperous Times)
  • Securing Your Doors with Deadbolt Locks
  • THE BEST OFF-GRID BATTERY
  • PLAN YOUR NEXT GARDEN

Recent Comments

    Archives

    • July 2018
    • June 2018
    • April 2018
    • March 2018
    • February 2018

    Categories

    • Alternate Energy
    • Gardening and Livestock
    • Home Security
    • Self Sufficient Living
    • Solar Power
    • Uncategorized

    Meta

    • Log in
    • Entries RSS
    • Comments RSS
    • WordPress.org

    Copyright © 2023 · Genesis Sample on Genesis Framework · WordPress · Log in